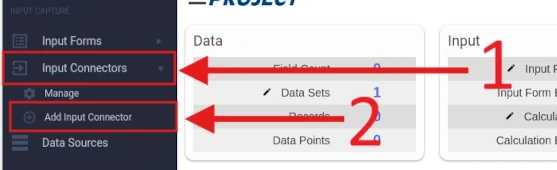
Click to create a new Input Connector on the sidebar and give it a name (EX: "First Incon")
This example will show us how to use Javascript to push data to an RLD One HTTP Receive Input Connector
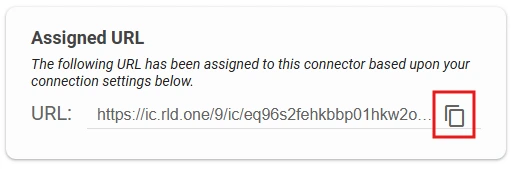
  // The URL under "Assigned URL" on your Incon Configuration
  const url = "<assigned_URL>";

  // The Data we are passing to the Incon
  // this is just an example, you can make this anything you like
  const data = {
        date: new Date().toString(),
        id: 1,
    data: {
          temp: 96,
      psi: 60
    }
  }

  // Do our fetch, make sure to:
  // - use the url we set above
  // - set the method to "POST"
  // - Pass the "Content-Type: application/json" in our headers
  fetch(url, {
         method: "POST",
     body: JSON.stringify(data),
     headers: {
          "Content-type": "application/json; charset=UTF-8"
         }
  })

  .then((response) => {

      // In RLD One we get back a 200 if the Incon got the POST
      // and processed it correctly, any other status code
      // we will consider a failure
      if(response.status == 200){
          console.log("Request Successful with response", response);
      } else {
          console.log("Request unseccessful with status code " + response.status + "\n", response);
      }
  })
  .catch((error) => {
      console.log("Request unseccessful with error", error);
  });
Where it says <assigned_URL> put in the URL for your HTTP Pull Outcon
RLD One Incons work best with json payloads
In this case the object data contains temp and psi and in RLD it will
show up as data.temp and data.psi
New Date().toString() just returns a string that looks something like this:
"Fri Apr 04 2025 15:22:44 GMT-0500 (Central Daylight Time)"
The http status code 200 is considered a success for RLD One, if you get back any other status code RLD One considers it a failure
In this case we use fetch api, but you can use any package that does http requests like Ajax
This example will show us how to use Python to push data to an RLD One HTTP Receive Input Connector
import requests

'''The URL under "Assigned URL" on your Incon Configuration'''
url = "https://ic.rld.one/12/ic/fk4v2xhzvyii91sa7kxq79dgwi4u2nvfnps7svsfqxjhwheu69u1fhqt3eaj625i"

data = {
 "date": "Fri Apr 04 2025 15:22:44 GMT-0500 (Central Daylight Time)",
 "id": 1,
 "data": {
     "temp": 96,
     "psi": 60
     }
}

'''
Make the POST request
 - use the URL we set above
 - Make sure to use the ".post" method
 - setting "json=data" lets the program know we are passing json and not some other format
'''
response = requests.post(url, json=data)

'''
 In RLD One we get back a 200 if the Incon got the POST
 and processed it correctly, any other status code
 is considered a failure
'''
print("Status Code:", response.status_code)
Where it says <assigned_URL> put in the URL for your HTTP Pull Outcon
RLD One Incons work best with json payloads
In this case the object data contains temp and psi and in RLD it will
show up as data.temp and data.psi
The http status code 200 is considered a success for RLD One, if you get back any other status code RLD One considers it a failure
In this example we use the requests library that is built into python3, however you can use any other library like urlib3 or aiohttp
This example will show us how to use Postman to setup a test
that pushes data to an RLD One HTTP Receive Input Connector
Create a new test inside your Postman workspace, if you aren't
familiar with postman or aren't sure what this means, check out
Postman First Steps
RLD HTTP receive uses the REST POST request to receive data,
in the dropdown next to the URL on postman make sure it is set
to POST
Copy your Incon's Assigned URL and paste it into the URL
field for your new postman request
Go to Body underneath the request URL, select the raw
option, make sure the body is set to JSON, and enter in the following text:
{
    "date": "Fri Apr 04 2025 15:22:44 GMT-0500 (Central Daylight Time)",
    "id": 1,
    "data": {
        "temp": 96,
        "psi": 60
    }
  }
Save your test and click the send button to test it out.
You will know if it worked if your Incon receives new INCOMING FIELDS.
To see if it has new incoming fields go to your Input Connector Manage Page and click the Incon you are testing.
Once you're there find the INCOMING FIELDS tab and when you click on it you should see:
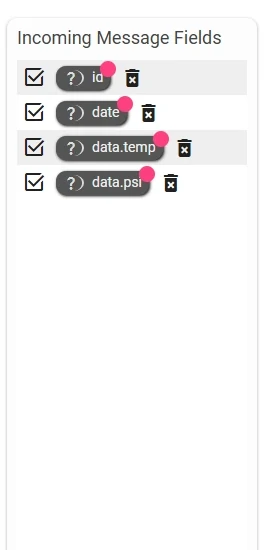
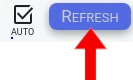
If you don't see them click the REFRESH button on the top right underneath
your account profile picture:
If that doesn't work try sending one more time, make sure the request was
successful, hit the refresh button and try again.
If it still isn't working hop in our discord and ask for help or email our support at:
support@reallifedata.net
 Wiki
Wiki