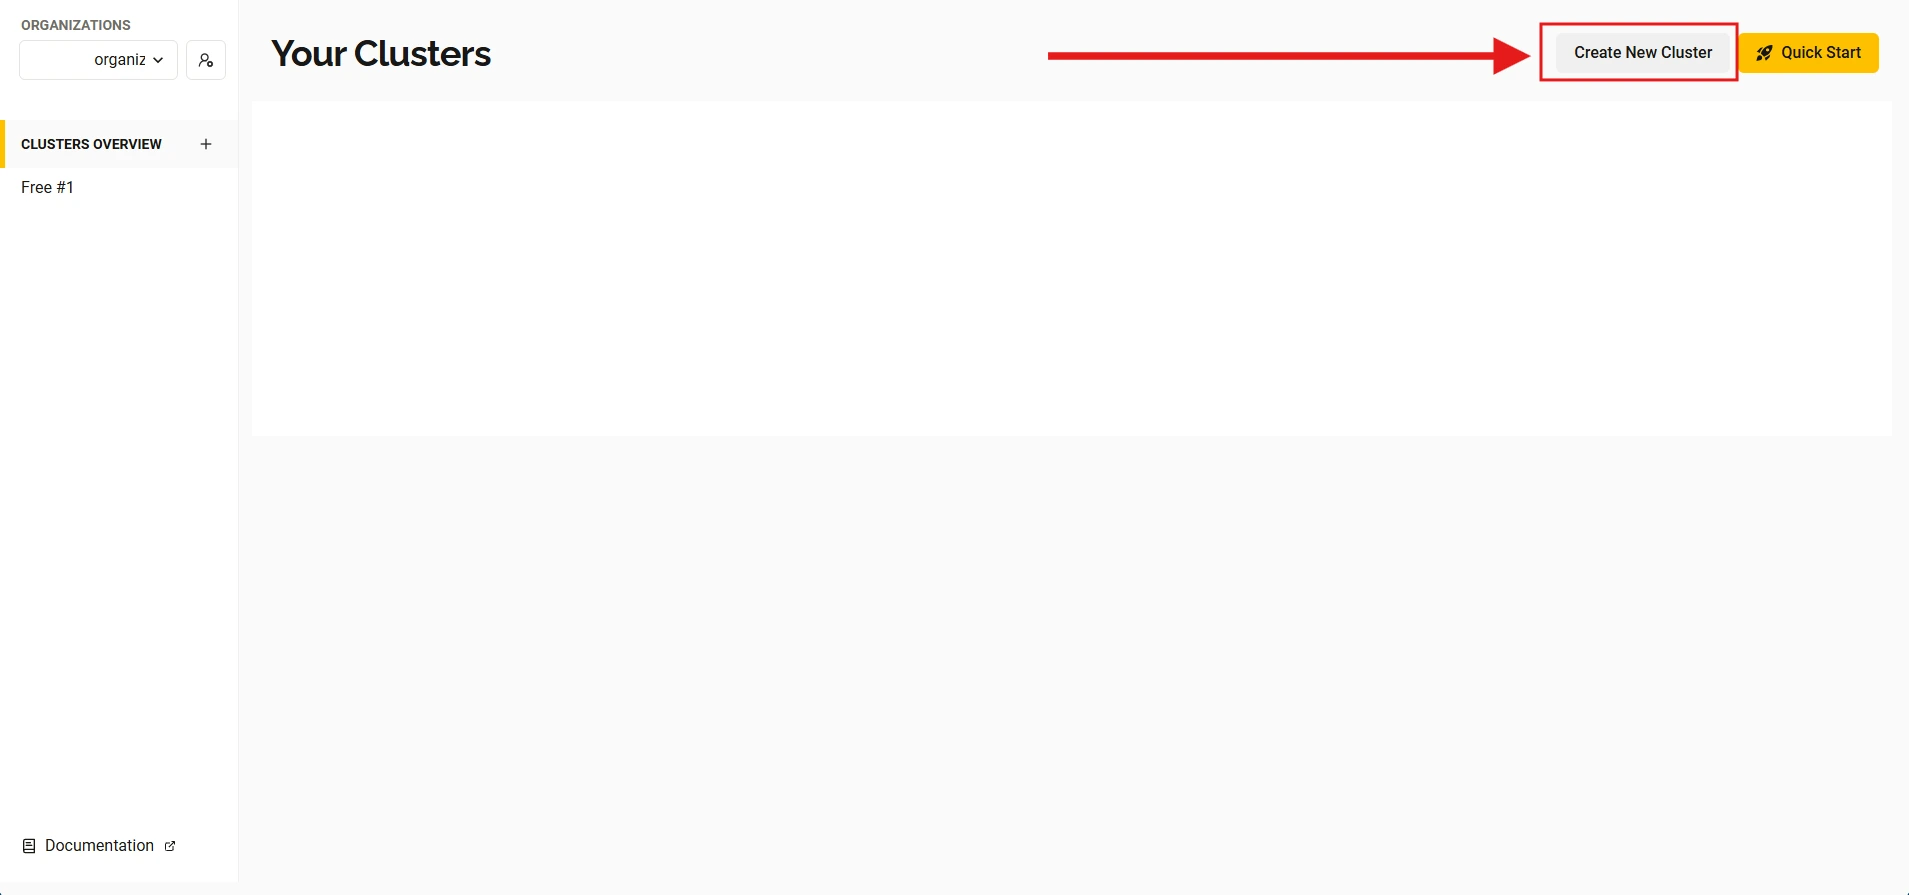
If you have an existing broker on HiveMQ skip to step 2
If you already have credentials make sure they are either client certificate or basic credentials (username password)
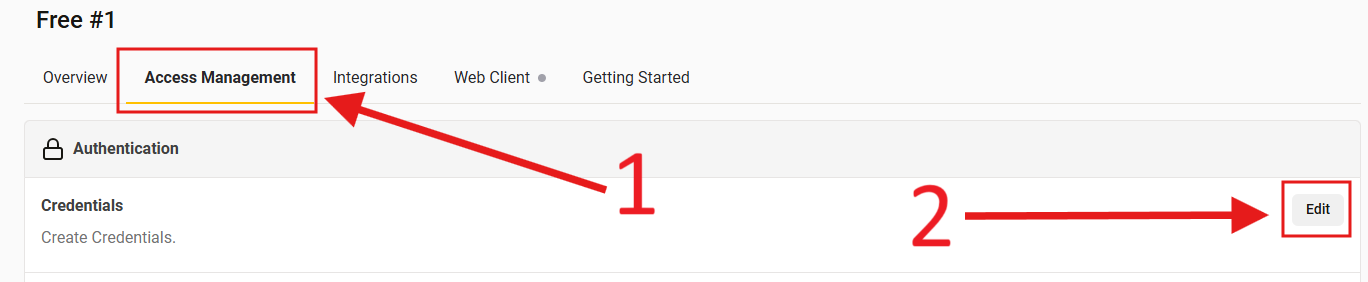
Get to the "Access Management" tab and click to edit your credentials.
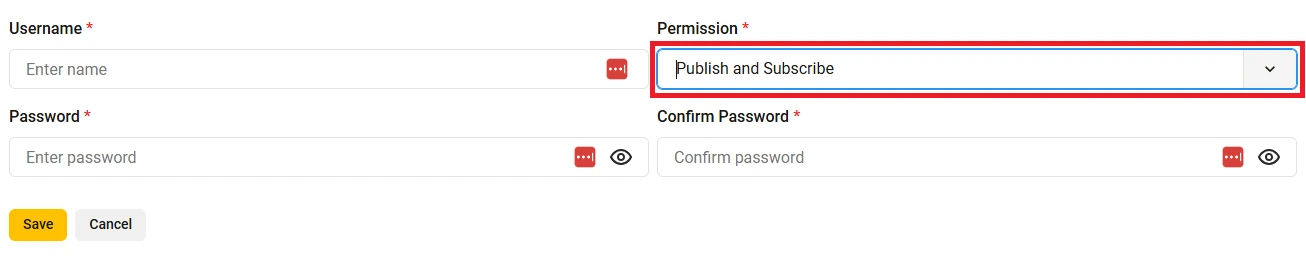
Click to add a new credential and enter in a username and a password (make sure you remember it)

Under Permission select "Publish and Subscribe" (Just "Publish" will do, but you may want to use the credentials again elsewhere for "Subscribe" as well)
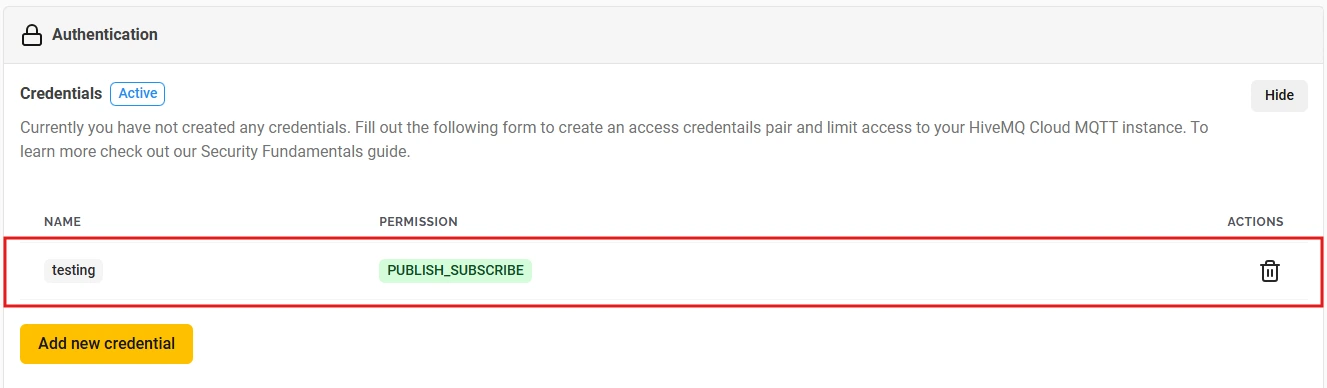
Once you're done and have clicked "save" it should look like this, except with the username you chose.
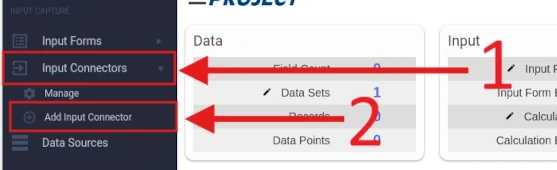
Navigate to and create a new Input Connector using the sidebar
Give your output connector a name, for example "MQTT Example" or "Test Input Connector".
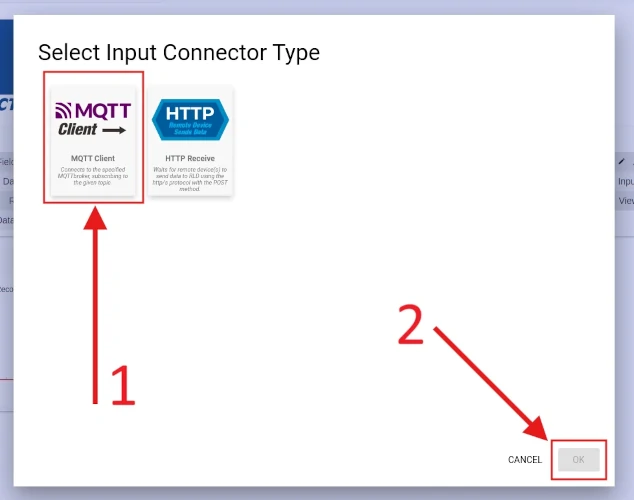
Select "MQTT Client" and click "OK"
Copy the URL from step 3 into the text field that says "Host Domain"
Add a topic that this MQTT client will subscribe to. In this example we will use "rldTest"
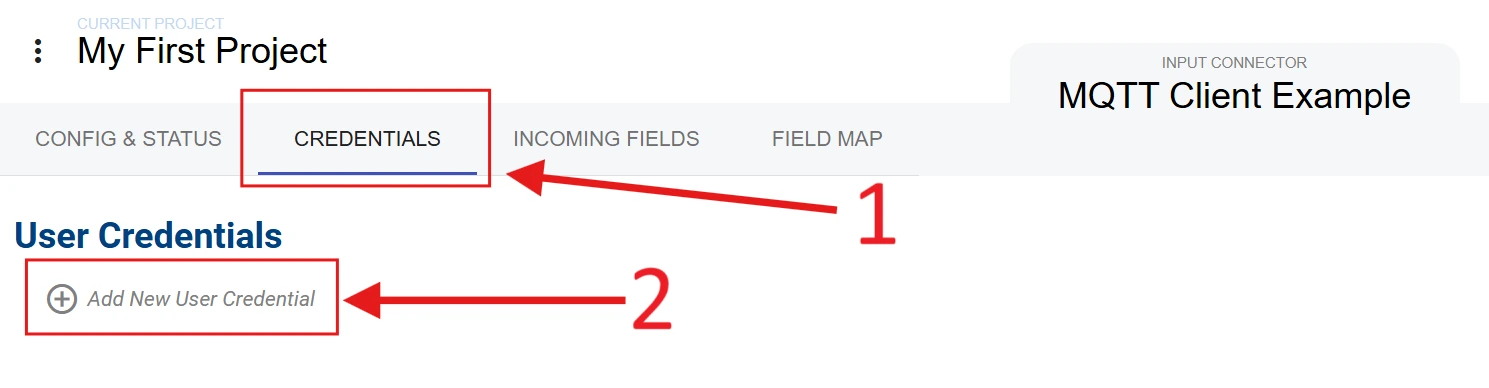
Open the creds tab and click to add a new credential
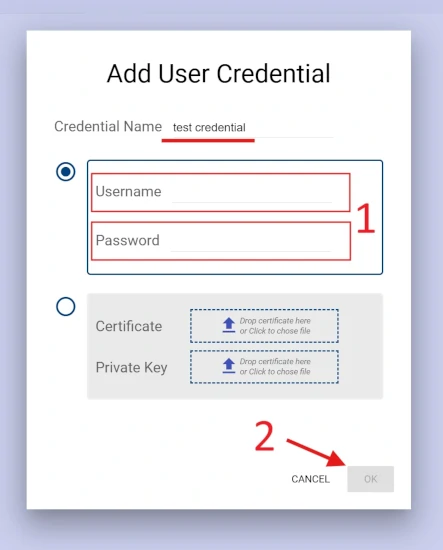
Name this "test credential" and add the username and password you created in step 2
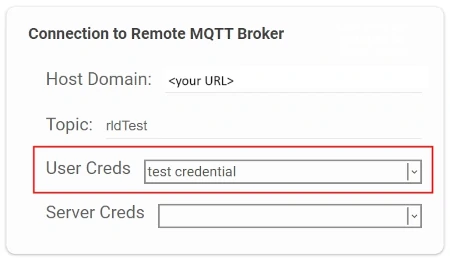
Go back to the 'Config & Status" tab and select your credentials
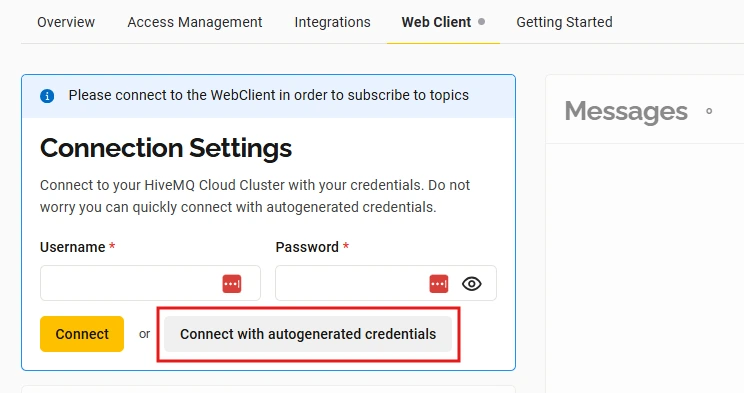
Connect with autogenerated credentials
Go to the "Web Client" tab and click "Connect with autogenerated credentials"
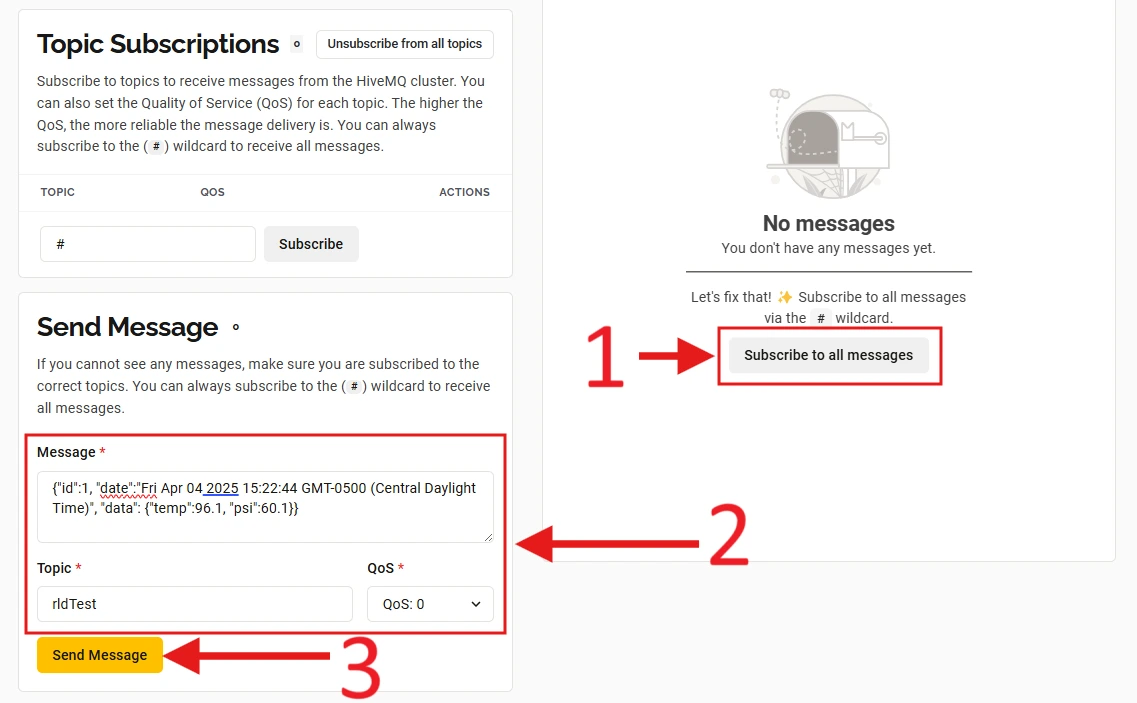
Send Test Message
Scroll down on the page to find "Send Message". Give it the topic you chose in
step 4. Next put in the following message:
{"id":1, "date":"Fri Apr 04 2025 15:22:44 GMT-0500 (Central Daylight Time)","data": {"temp":96.1, "psi":60.1}}
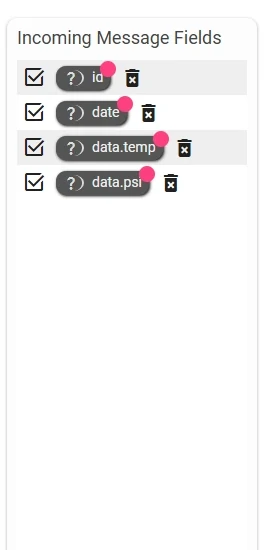
Check your RLD Input Connector
Go back to your RLD Incon and go to the "Incoming Fields" tab, where you should see the following if you
have done everything correctly
Watch the following gif which shows you how to find the new fields and drag them into RLD One's automatic translation tool
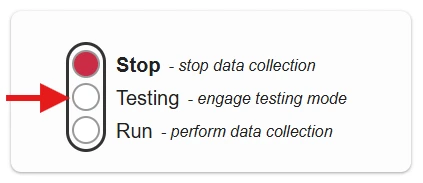
Once you've done all this and been successful in setting up your RLD MQTT Input Connector all that is left is to
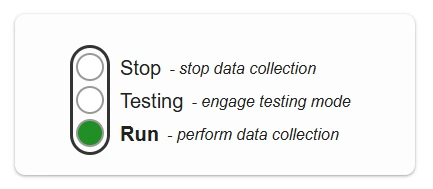
take it out of test mode.
Go back to the "Config & Status" tab and click on the "Run" button on the stoplight and you're all good to go!
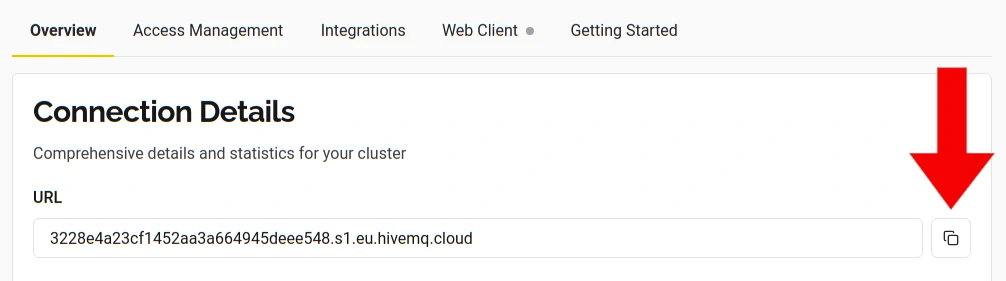
Find this line and copy the URL (we need to save this for late in step 5)
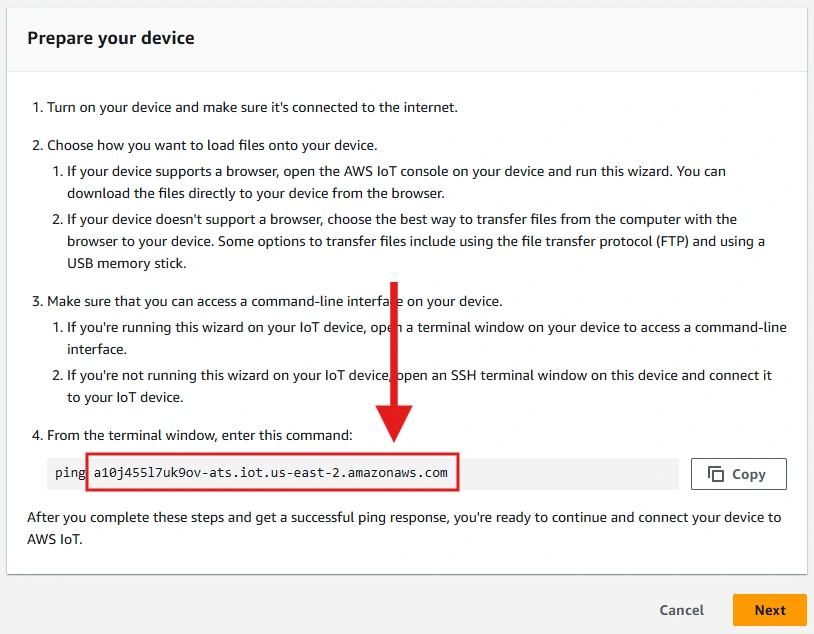
Click "Next" at the bottom right of the page
Navigate to and create a new Input Connector using the sidebar
Give your output connector a name, for example "MQTT Example" or "Test Input Connector".
Select "MQTT Client" and click "OK"
Copy the URL from step 1 into the field that says "Host Domain"
Add a topic that this MQTT client will subscribe to. In this example we will use "rldTest"
To do this one you're going to want to unzip and open the "Connection Kit" from our AWS Thing Device we made in [step 1]
Now in RLD we need to create a new credential
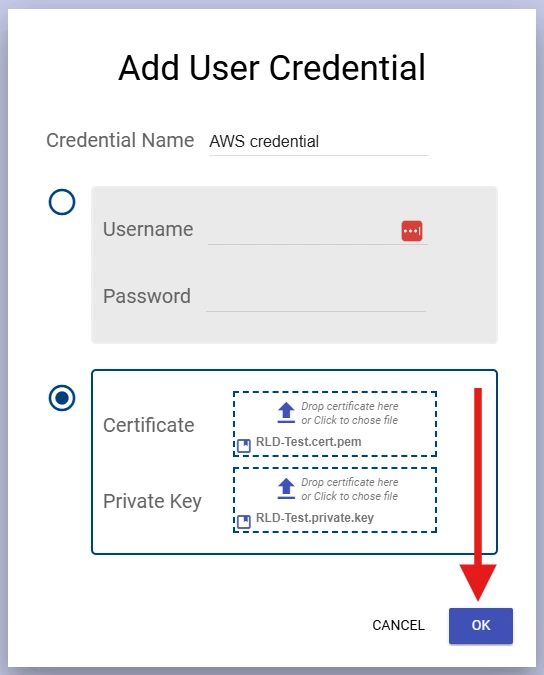
Now we need to grab the certificate and private key from our "Connection Kit"

Once you've done this the page should look like this. Click "OK"
To do this first you need to visit this link and download the file from it: https://www.amazontrust.com/repository/AmazonRootCA1.pem
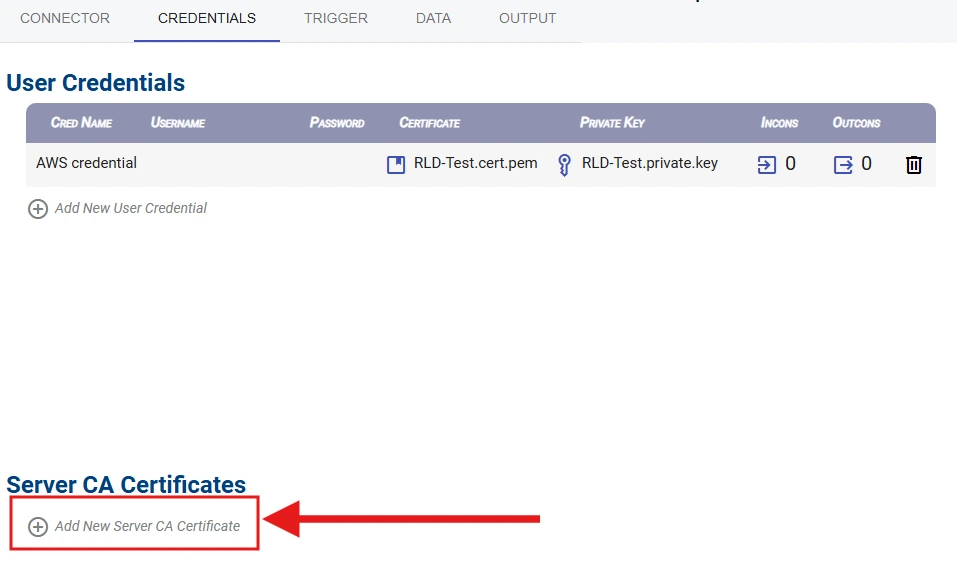
Now on the RLD Credentials page click on "Add New Server CA Certificate"
Upload the certificate you downloaded to this screen, it should look something like this.
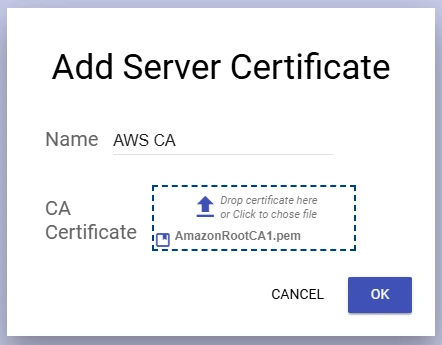
Click "OK"
Activate this new policy by scrolling all the way down, selecting the highest version number (should be 2) and then clicking the "Set as active" button (follow the gif below)
Here is a short video of the whole process:
From here you should be able to go into testing mode!
'
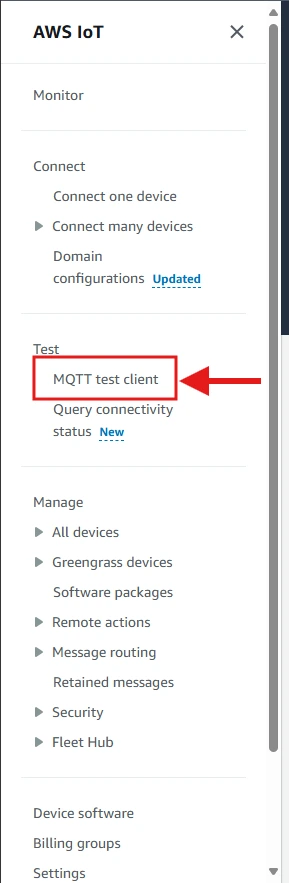
Open AWS MQTT Test Client
Give that 10 seconds to begin working then go back to AWS and open up the aws test client here:
Publish a test message
Select "Publish to a topic" and enter in a topic name that matches the topic we chose in step 6
Put in the following message then click "Publish":
{"id":1, "date":"Fri Apr 04 2025 15:22:44 GMT-0500 (Central Daylight Time)","data": {"temp":96.1, "psi":60.1}}

Check your RLD Input Connector (Incon) Go back to your RLD Incon and go to the "Incoming Fields" tab, where you should see the following if you have done everything correctly
Watch the following gif which shows you how to find the new fields and drag them into RLD One's automatic translation tool
Once you've done all this and been successful in setting up your RLD MQTT Input Connector all that is left is to
take it out of test mode.
Go back to the "Config & Status" tab and click on the "Run" button on the stoplight and you're all good to go!
 Wiki
Wiki