
In this example we have been gauging temperature and pressure.
But what do we do if that temperature or pressure gets too high?
We are going to set up an alert that checks the temperature and
sends us a text message if it is too high.
First we need to set up our application to check if the temperature
is too high. So lets go to the Calculations screen and create
a calculation that does this for us.
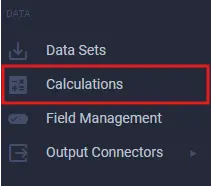
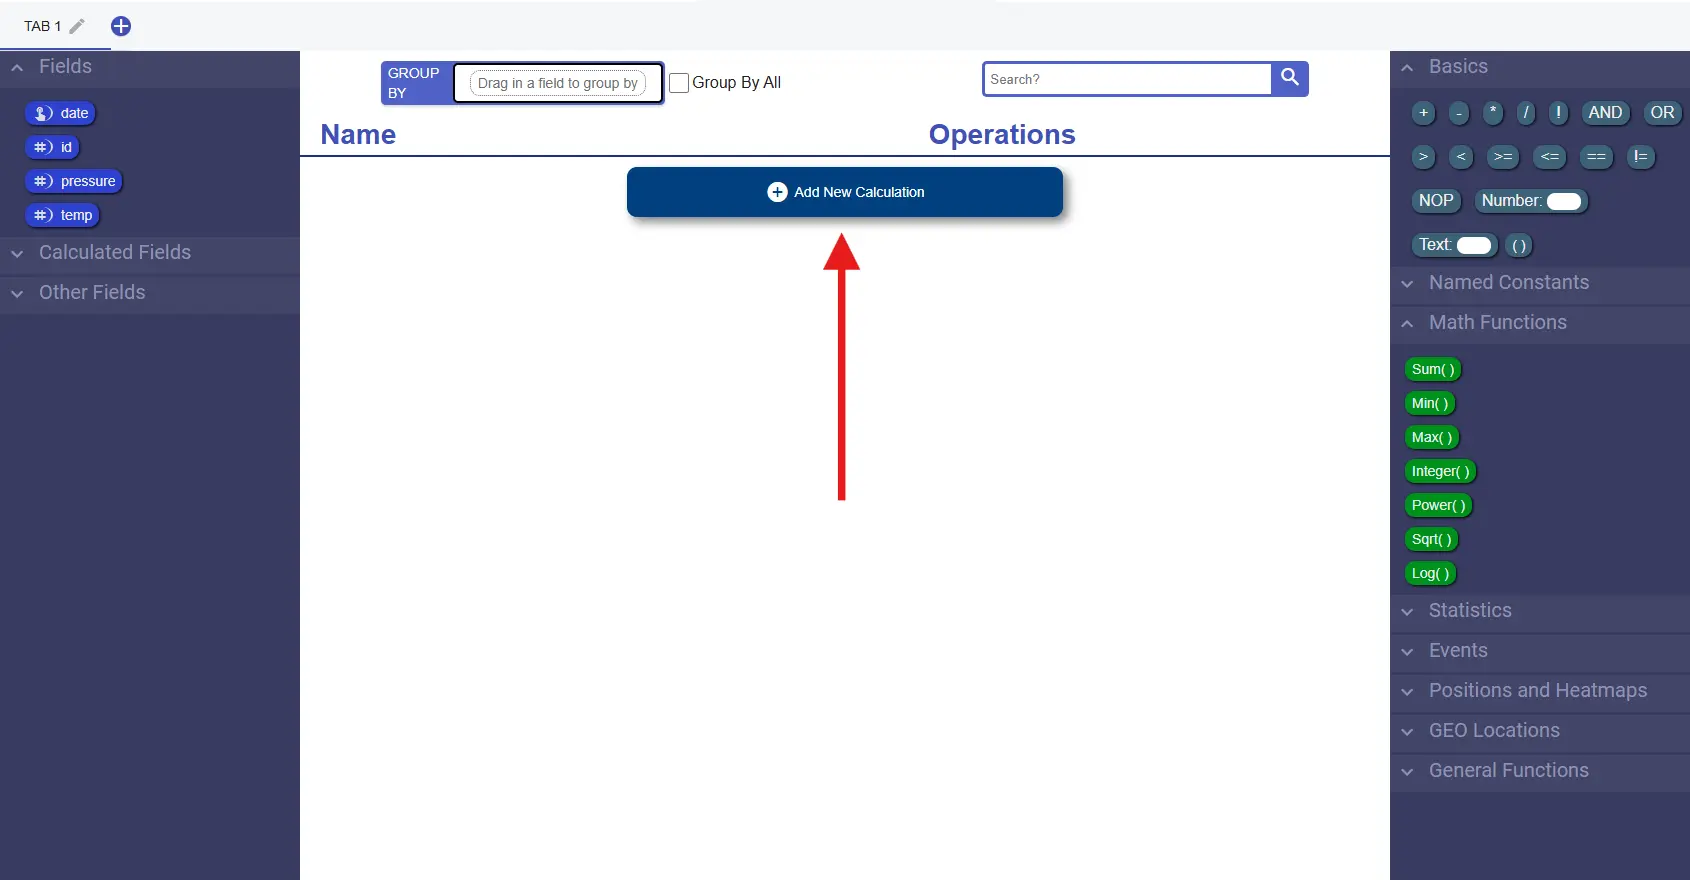
Once we click on Calculations on the sidebar we should end up
at a screen like the image below. Click on the Add New Calculation
button.
Once we have done that put in a name for oour calculation, for example
"temp too high", and give it the following formula: temp > 80

Great! Now we have a calculation that we can use for our trigger!
If you'd like to learn more about calculations check out our wiki
articles about Calculations
First we need to go to the sidebar and go to the manage screen for
our output connectors
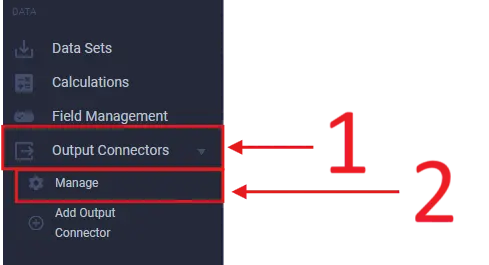
Once we are there we need to click to create a new one and select
a type for it. Since this one is going to be used for sending out
alerts, select the SMS type.
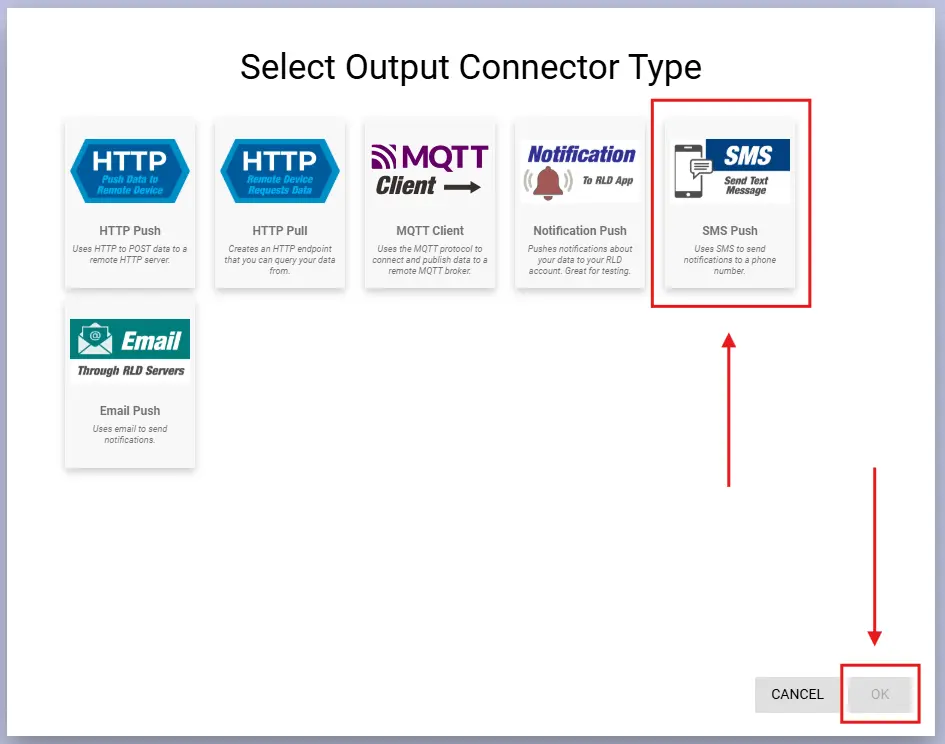
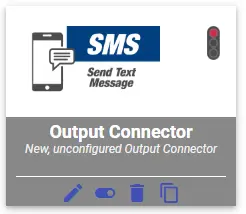
Once we have selected SMS and created our output connector,
we will see a tile show up, click this tile so we can edit
our new alarm.
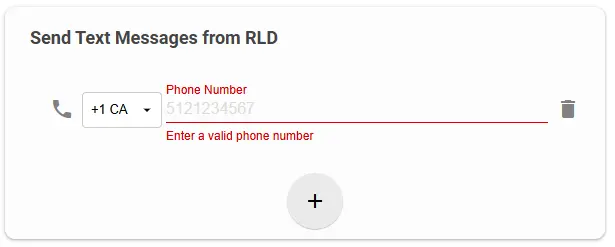
Now we are in the config for our SMS output connector. Go ahead
and add your phone number so the output connector knows where to
send alerts. (Don't worry, you can delete this phone number later)
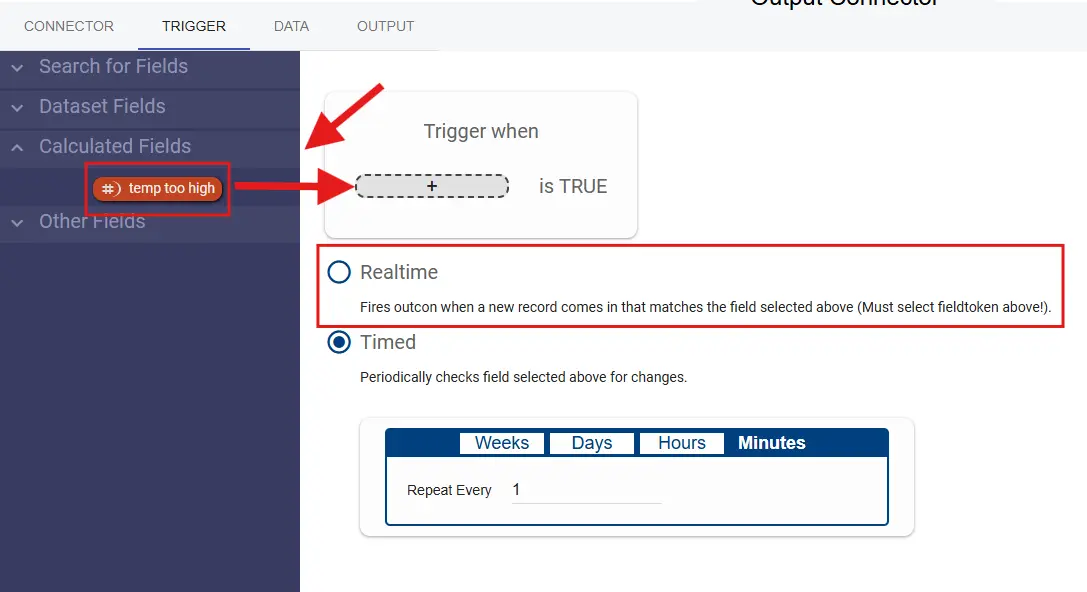
Next lets go to the trigger tab and configure our alarm to check
the temperature in Real time, and only to go off when temperature
is too high.
Once we are in the trigger tab, select Realtime, then click on
the Calculated Fields bucket and click and drag the temp too high
field into the Trigger when ___ is TRUE box.

Now Lets go to the output config and type out what our message will
be when you recieve a text message.
In this tab we can compose a message that includes static text as
well as data from the incoming data. The gif below shows the composition
of a small message that includes the current temperature.
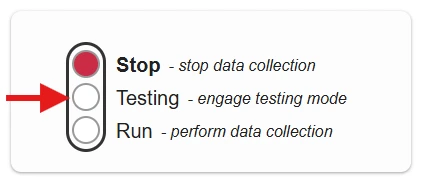
Make sure you put your output connector into test mode
In order to test we need to send data into our system again. If you
have been following this Getting Started Tutorial so far,
then use the commands below (based on your Operating System) to send data
into your system. (Remember to replace the <assigned_URL> with the URL
we got from this step
Linux/macOS Terminal
curl -X POST -H "Content-Type: application/json" -d '{"id":1,"date":"Fri Apr 04 2025 15:22:44 GMT-0500 (Central Daylight Time)","data": {"temp":96.1, "psi":60.1}}' "<assigned_URL>"
Windows PowerShell
curl.exe --ssl-no-revoke -X POST <assigned_URL> -H "Content-Type: application/json"
 -d '{\"id\":1,\"date\":\"Fri Apr 04 2025 15:22:44 GMT-0500 (Central Daylight Time)\",
\"data\": {\"temp\":96.1,\"psi\":60.1}}'Otherwise, use whatever mechanism exist in your system to input data that has a temperature > than 80.
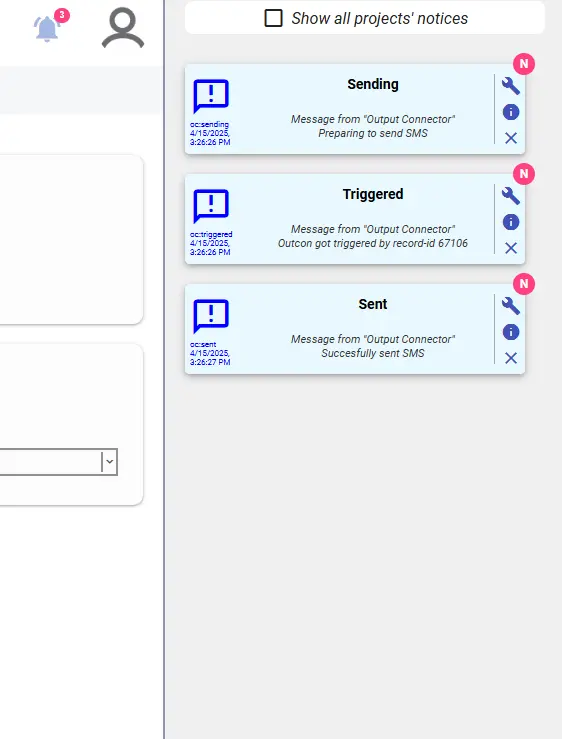
On any screen on the RLD One platform you should see a bell icon in the top right corner. Once you've sent your data you should see a number pop up on this bell to indicate we got a platform notofication. Click on the bell to see the notification.

Once you have opened the notifications you should see 3 notifications that look like this:
 ;
;
If you see these it means that:
At this point you should have recieved a text message to your phone depending on the availability and speed of your network.
We are going to make an output connector that allows us to pull
data from our RLD project using a REST API GET method.
In escence, with this Output Connector we are using RLD as a
no-code database and are setting up a REST API to retrieve data
from that database.
First we need to create a new Output Connector. On the leftmost sidebar
click on Output Connectors then click Add Output Connector and
give a name, EX: "HTTP Pull Connector"
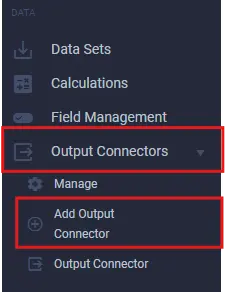
Once we have done this select the HTTP Pull type and click "OK"
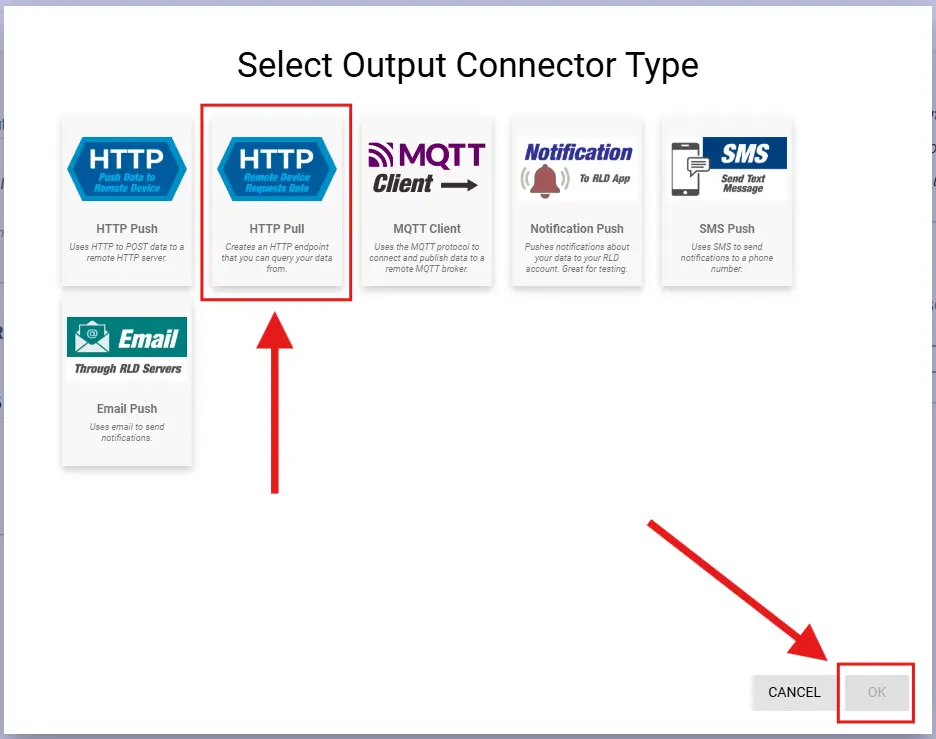
Once you've done the above you'll end up on the config screen for Output Connectors.
Go ahead and click on the DATA tab at the top. Here we are going to
configure the data that comes out of our connector. We are going to
change it to include All Records and on the left we can find all
the fields in our project that we can include in the data that gets
sent.
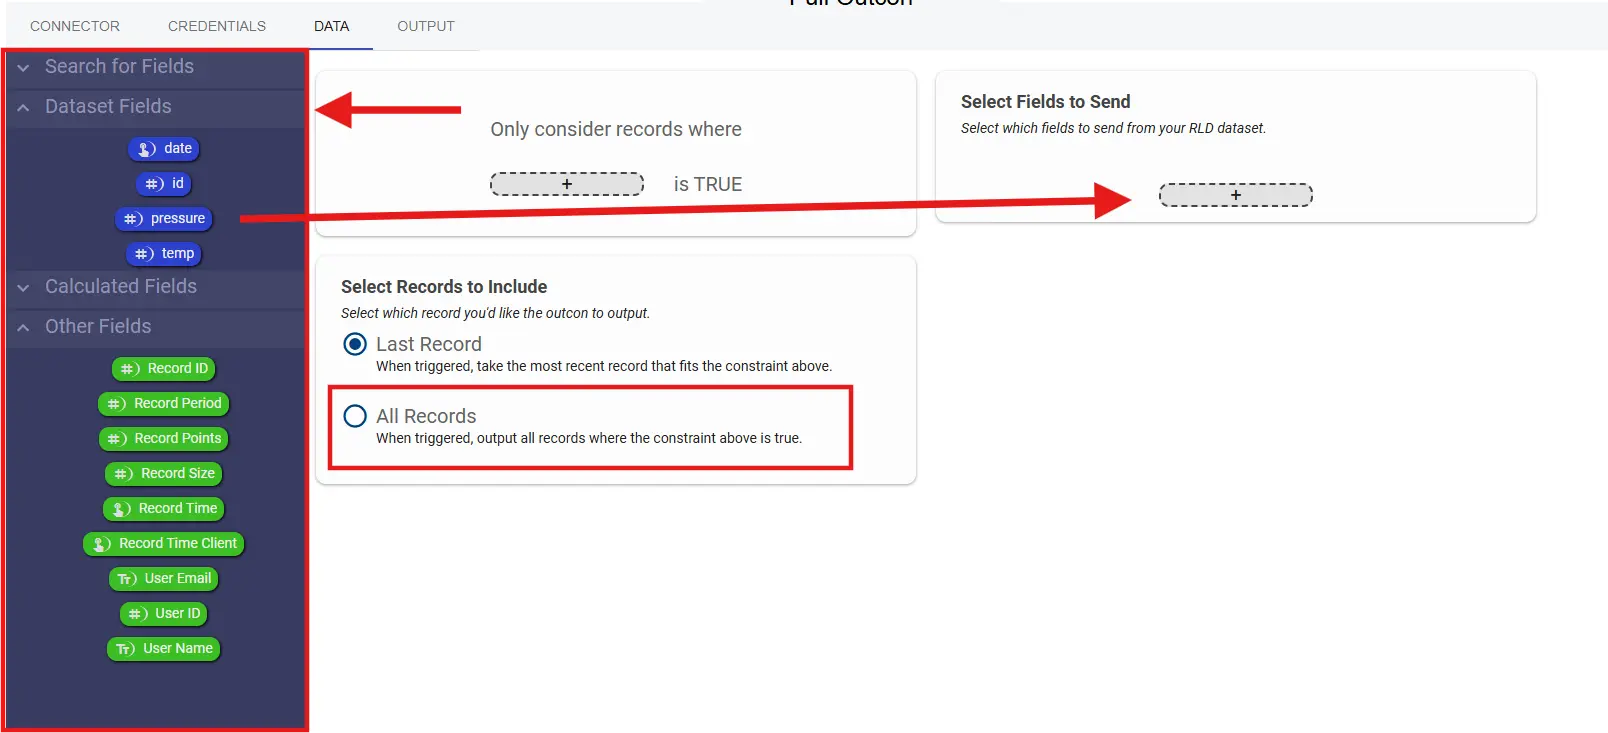
The video below shows how we should configure this outcon:

Great! We are all done, now all that is left is to go to the CONNECTOR tab and turn our output connector to "Run" mode.
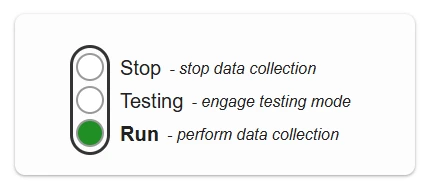
Make sure you put your output connector into test mode
In order to test we need to make an REST GET method call to our assigned URL. Use one of the following commands below (based on your operating system)
Linux/macOS Terminal
curl <assigned_URL> Example Response:
[{"id":1,"temp":98.3,"pressure":60,"time":1744669169379},
    {"id":1,"temp":98.9,"pressure":59,"time":1744669180338},
{"id":1,"temp":100.2,"pressure":56,"time":1744669189109},
{"id":1,"temp":103.5,"pressure":54,"time":1744669203506},
{"id":1,"temp":109.1,"pressure":56.8,"time":1744669215544},
{"id":1,"temp":108.6,"pressure":55.3,"time":1744669229773},
{"id":1,"temp":102.8,"pressure":55,"time":1744669241983},
{"id":1,"temp":99.9,"pressure":50,"time":1744669250476},
{"id":1,"temp":96.1,"pressure":60.1,"time":1744748786721}]
Windows PowerShell
curl <assigned_URL>Example Response:
StatusCode        : 200
   StatusDescription : OK
   Content           : [{"id":1,"temp":98.3,"pressure":60,"time":1744669169379},
                        {"id":1,"temp":98.9,"pressure":59,"time":1744669180338},
            {"id":1,"temp":100.2,"pressure":56,"time":1744669189109},
            {"id":1,"temp":103.5,"pressure...
   RawContent        : HTTP/1.1 200 OK
               Connection: keep-alive
                       Access-Control-Allow-Origin: *
                       Access-Control-Allow-Credentials: true
                       Access-Control-Allow-Headers: Authorization,Accept,Origin,DNT,X-CustomHeader,Keep-Alive...
   Forms             : {}
   Headers           : {[Connection, keep-alive], [Access-Control-Allow-Origin, *],
                        [Access-Control-Allow-Credentials, true], [Access-Control-Allow-Headers,
                       Authorization,Accept,Origin,DNT,X-CustomHeader,Keep-Alive,User-Agent,
                       X-Requested-With,If-Modified-Since,Cache-Control,Content-Type,Content-Range,Range]...}
   Images            : {}
   InputFields       : {}
   Links             : {}
   ParsedHtml        : mshtml.HTMLDocumentClass
   RawContentLength  : 516
You should get a response that looks like one of the ones above.
You should also get notifications in the RLD One platform which can
be viewed by clicking on the bell icon in the top right corner of
any screen here:

Join our discord to ask questions directly of the developers, as well as other RLD users.
We are happy to help guide you through RLD, answer basic and complex questions, and talk
everything IoT, data collection, and data telemtry!
 Wiki
Wiki